It’s difficult to begin speaking about a product that has nothing like it on the market. I can’t say – “Hey everyone! Here’s a new version of ‘bleh’ that you can try out in its new and improved form!”. With that, I’m just going to jump into it and tell you all about my experience with Wear Bands. I’ve had this for about 6 weeks now and put it through some strenuous testing in every possible way I could think of, and I’ve intentionally not been nice to the equipment.
.
First off, what the hell are Wear Bands? Think of resistance bands. You secure them on a frame, a rack, or you hold them in place yourself and you use those as a resistance workout for whatever appendage you are currently using. Now imagine that, but also make it something you wear, so your legs have constant tension on them when you train. It sounds REALLY gimmicky. While looking at it, I found out Spartan Pro Team Member: Robert Killian uses them. So, I gave him a buzz for his thoughts, got some great information and a good instructional of what to do when I put them on and use them for the first time.
Wear Bands Explained
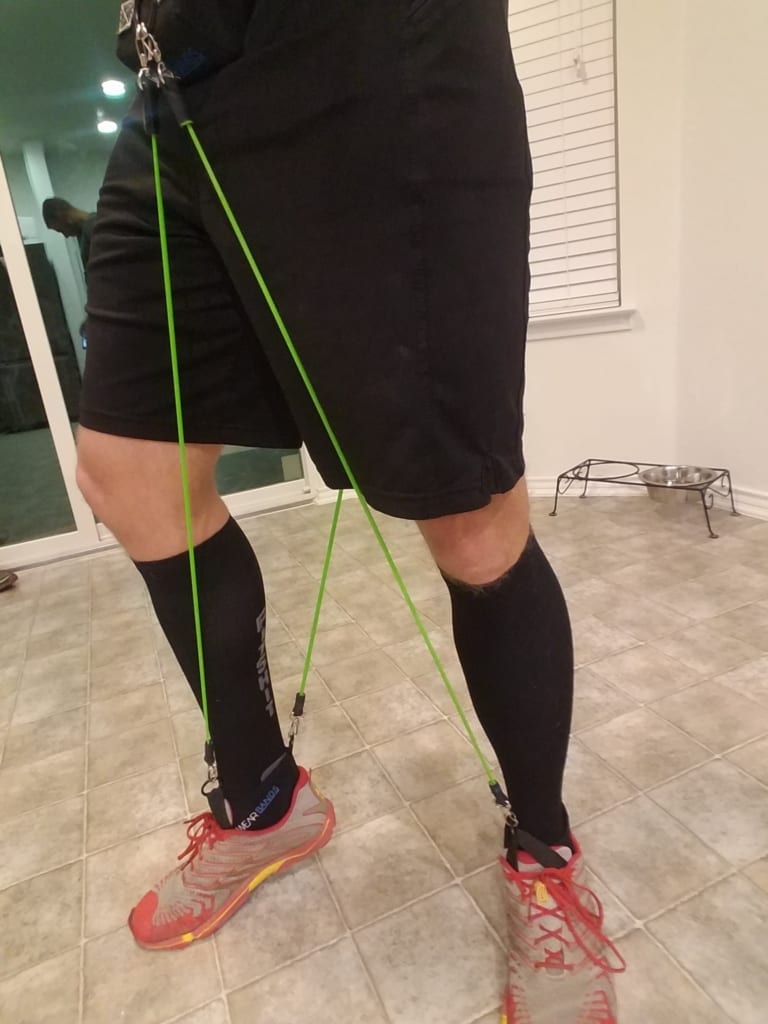
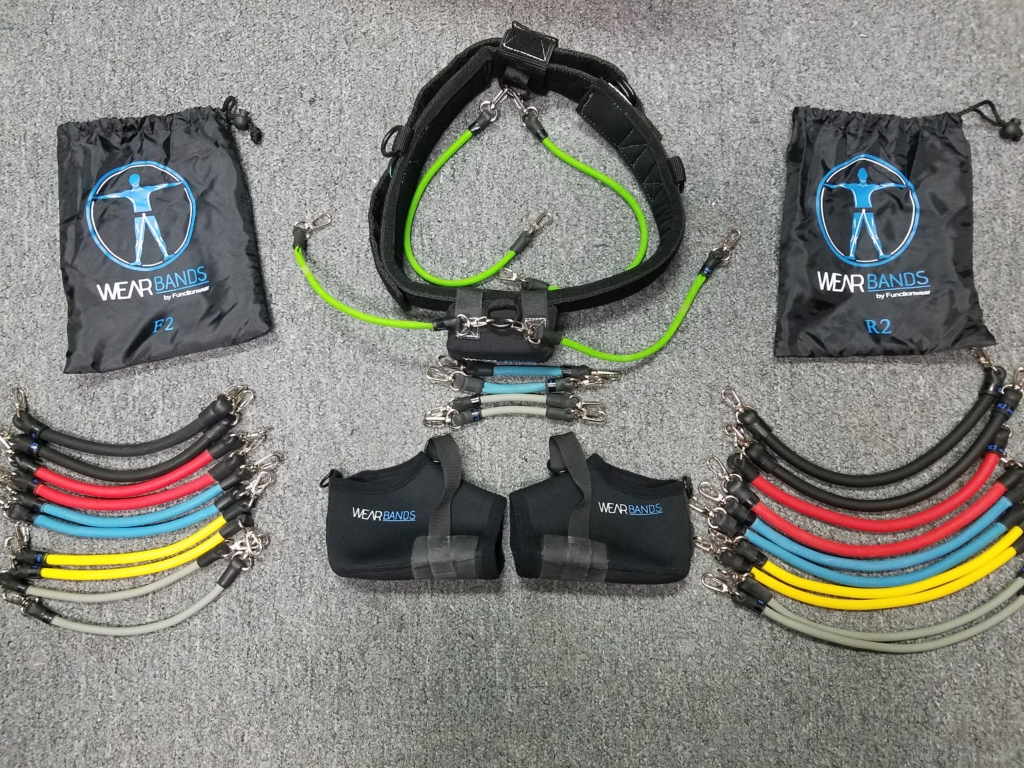
 Enter, the apparatus! That’s really the only way I can properly describe it. It’s not something you can just pop on and into. I cover this in the video, but I’ll go over it here quickly. First time setup takes a good 7-10 minutes to get it all correct. First, I recommend you have a second pair of shoes that you can semi-dedicate to this so each time you use the system, it won’t take as long to setup. You are supposed to install the set of bungee laces that come with the wear bands. I didn’t get a set of these in my review kit; this will come up later, but no worries. Next, you’re going to put on the WB socks and get them about half way down the tongue of your shoe. If you have shoes that have a side attached tongue, just make sure you’re wearing high socks to prevent rubbing. Next you put on the belt with the Front clip and block, where the clip is ABOVE the block. Make it tight and above your hips so it doesn’t slide down. Attach the Velcro rear hook-ring. Attach the shorter bands you’re going to use to it ahead of time, it makes it easier in just a sec. Once that’s complete squat down and attach the rear bands to the rear clip of the WB sock, and the front longer bands to the front of the sock and top hook-ring. There ya go!
Wearing the Wear Bands
Now that you’ve just put this thing on, this is where it gets interesting. You are now wearing resistance bands for your legs. You must actively push your feet down to get them on the ground. These guys clearly have a vendetta with gravity. It feels strange, very foreign. As I stated earlier, there is nothing to compare this product to… welcome to the wild west of training gear.
YYEEEEEEEEEHHAAAWWWWWWWWWWWWWW!!!!!! I live in Texas, I’m allowed to do that.
Your first time wearing these, DO NOT just go for a normal run. Oh no… In fact, don’t even do that for a few weeks. This product does require that time to break in. In the meantime, I want you to walk. Do lunges, and a bunch of the exercises I have shown in the video. You need to get used to these. You also need that sock to stretch out and you need your feet used to being under tension. Your first few times wearing this, you’re going to get mid-foot cramps. They will be worse if you just start running with it off the bat. This is normal. Now, to alleviate these cramps, detach the front loop from the front sock hook, and grab the first three elastic laces in the front of your shoe, and attach it to those three. That will help take the cramp away. Once you feel good again, go back to clipping on the sock. As stated, I don’t have the elastic laces, so I just detached for a bit completely and achieved the same result.
Benefits of Wear Bands
So, now that I’ve gone over the basics of just using this thing, what the hell is it used for? Good question! I honestly didn’t have much of an idea when I first got the package. What I’ve found over the past six weeks is right in line with the conversation I had with Robert K. By putting this resistance on you are having to increase your output to achieve the same results. Now, I hear you say: “Oooookaayyyyy. What benefit does that give?”

There are two main benefits. First by having to have a higher output during the same workload, you’re going to get the muscle atrophy you are looking for at a quicker rate. This will help overall muscle growth and help train for longevity the longer you use them, and the longer you wear them at a time. Next, you’re working a completely different muscle set than you normally do during these exercises and runs. After a few weeks, when you’re out running, not only are you getting your normal leg workout in, you’re also training the explosive muscles you need for bursts of speed, hill climbing, etc. that you find in every OCR. For those of us that live-in areas that don’t have any real hills or mountains, this is FREAKING GREAT for us.
I even had my friend, and ANW Season 6 finalist and owner of Power Park Fitness, David Yarter, give them a spin. Hear what he had to say about them, and just watch him be a damn beast in the second video. One last thing I must say here is, when you do get to the point you start running. Start low with no more than a mile at a time. Build up to longer distances. Be sure to also run with a metronome set to 180. This will hale make sure you’re still striking when you need to. The added push can slow down your cadence at first, and it’s important to practice with good form and cadence from the get go.
.
Resistance Levels
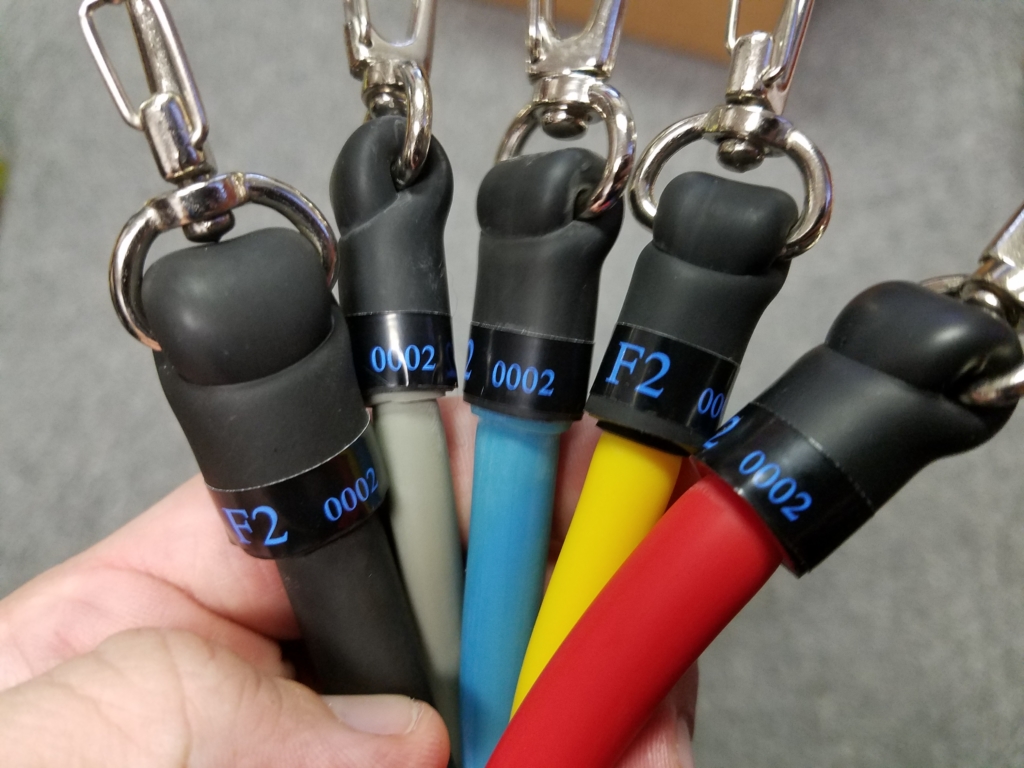
 With all this good, comes just a couple gripes. These are nothing to dissuade, just something for V2. First off, The resistance bands. I received an entire set of fronts and rears for all the increasing levels of resistance. If they are all increasing, why are they all labeled 0002? Come on guys. Yes, they are color coded, and get thicker. Some people are color blind, and or don’t have the best vision, so it could be difficult to distinguish them at a quick glance. 0001, 0002, 0003… Simple fix there. My only other tepid gripe is I’m a guy who doesn’t shave his legs. You have rubber bands going across your legs while running. It’s going to pull your leg hair. My fix was just to wear full tights or knee high socks (which I cover in another review here).
Overall those three gripes I had with the bands are nowhere near enough to stop using this product or not recommend it. As I said earlier, there is nothing else on the market that does what this does. What I especially like is these guys have made no crazy claims as to what it does. Only that it works you harder and develops your muscles in a new way, which in our sport is VERY useful. There is no equal to this product, and I highly recommend you give these a try.
A complete set will run about $85.00 but MRG has a special offer for you. Use discount code MRG 15 for 15% OFF your Wear Bands order.


“There are two main benefits. First by having to have a higher output during the same workload, you’re going to get the muscle atrophy you are looking for at a quicker rate.”
typically atrophy isn’t a good thing :0
Hey Josh, I was referring to muscle atrophy when training rather than sedentary atrophy. Much like when you’re lifting weights, you cause micro tears that cause the muscle to grow by filling in that area and thus, building more muscle. You’re still causing the muscle to break down, but in a controlled way that stimulates growth.
Hello to every one,
I have had the Wear Bands for 4 days and 2 workouts. I do a HITT workout on my second day of wearing them and to my surprise, the bands popped through the ring on my right side. I was sooooo disappointed because it was in the middle of my work out. I had to stop and take them off. So I email the company. I agree with this article the 1st time I was exhausted with them on, but now I am contemplating on returning them!